How to Use the Dressmaker Sketchbook
The sketchbook puts the customer brief, your design and the available controls on one screen. Use it to make a deliberate choice before you press Draft Pattern.
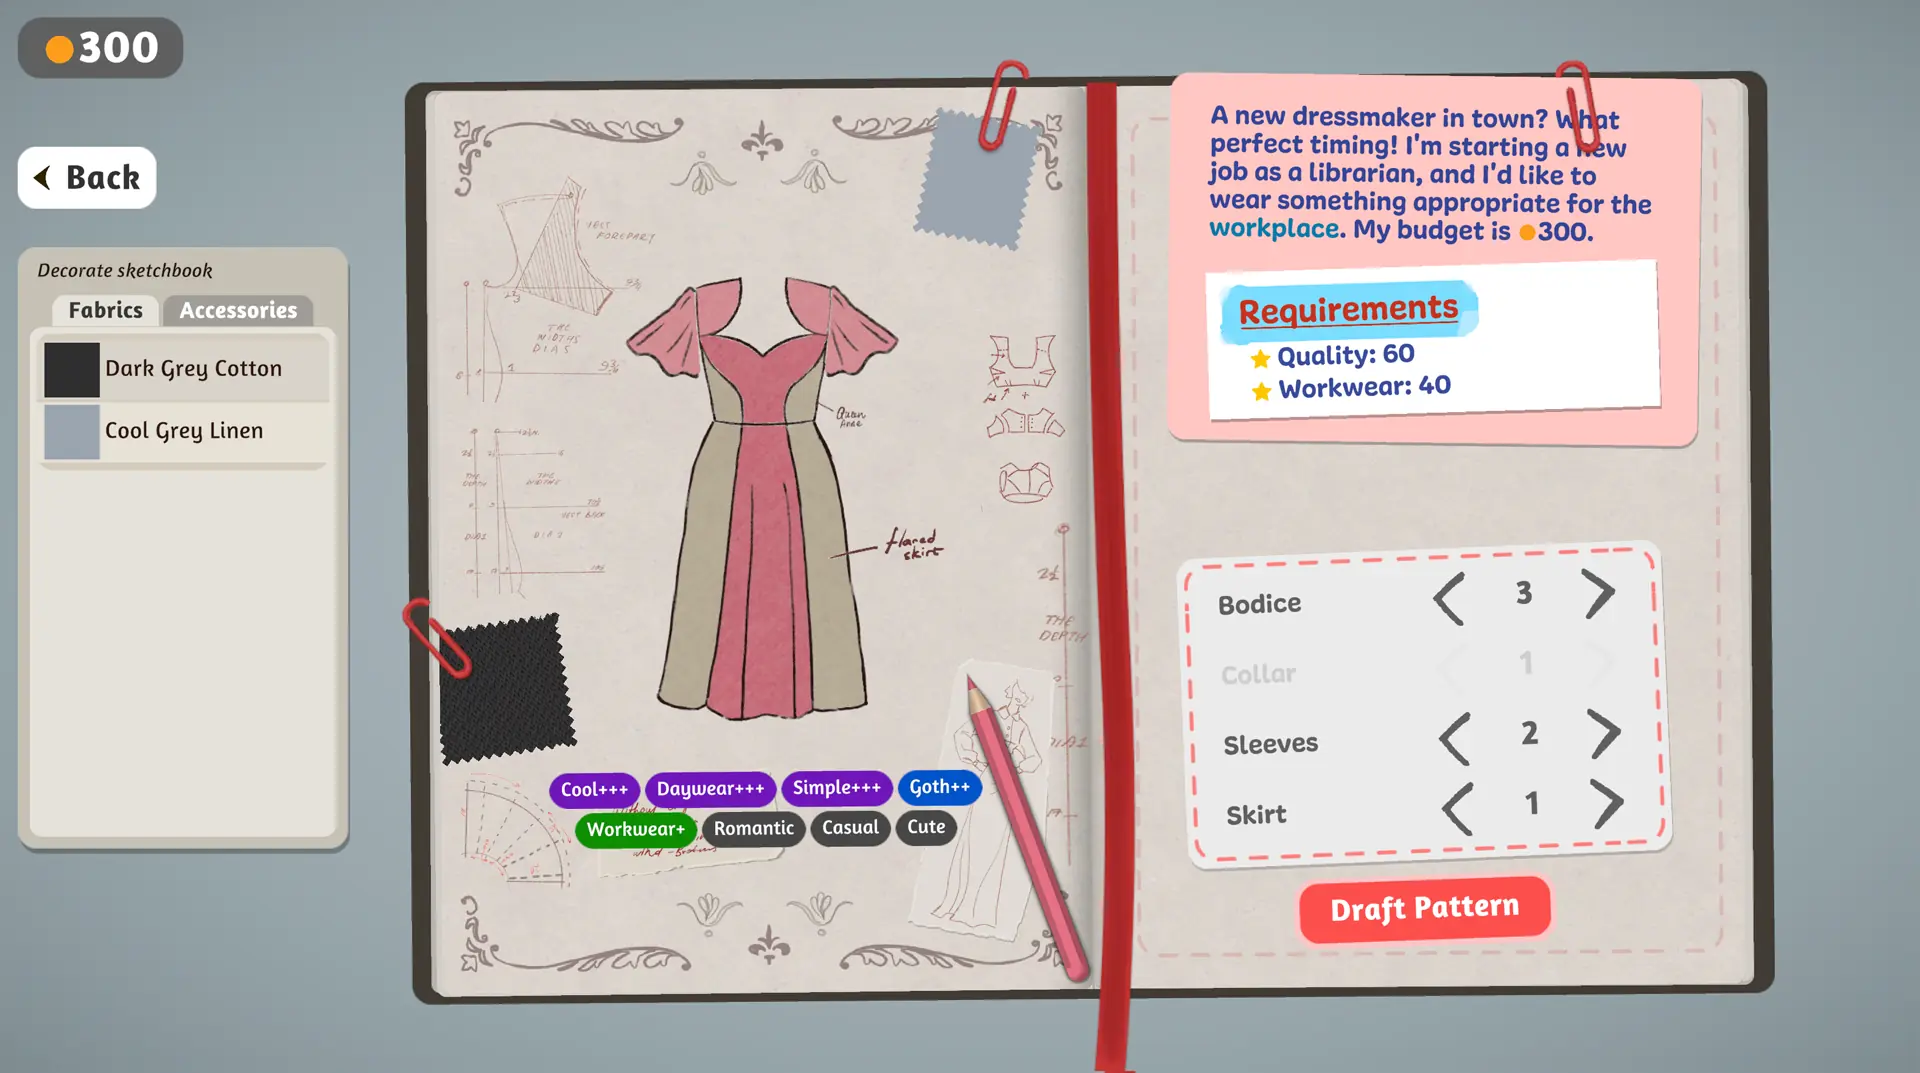
1. Read the brief and targets first
Rose says she needs a dress suitable for her new librarian job and gives a budget of 300. The Requirements box in this image lists Quality: 60 and Workwear: 40. These are Rose's visible targets in this example, not fixed targets for every order. Note both the occasion and the numbers before changing the design.
2. Work from the center outward
The large drawing is your current dress. The control panel at the lower right shows separate rows for Bodice, Collar, Sleeves and Skirt, with arrows for the available choices. In this captured state, the Collar row is faded. Treat a faded control as unavailable on that screen rather than repeatedly clicking it.
- Change one available dress part with its arrows, then look at the whole silhouette.
- Compare the visible style tags under the drawing with the customer's request.
- Keep or undo that choice before changing another part. This makes the effect of each choice easier to notice.
The screenshot shows a green Workwear+ tag among several other tags. That is a useful clue for Rose's brief, but the screenshot does not reveal the game's exact scoring formula or guarantee a completed dress will pass.
3. Compare fabrics in the preview
The Fabrics tab on the left visibly lists Dark Grey Cotton and Cool Grey Linen in this state. The Accessories tab is beside it. A swatch can look different when it covers a bodice or skirt, so judge the assembled drawing rather than choosing from the name alone. If a fabric choice changes the style tags, compare the result with the Workwear requirement before continuing.
4. Check before drafting
Once the garment is made, compare its displayed values with the original requirements. Our quality and target guide shows how to read that later screen. For more on fabric and cutting decisions, read fabrics and patterns.